Email Setup IOS
A Step by step guide on how to setup your iPhone to receive emails.
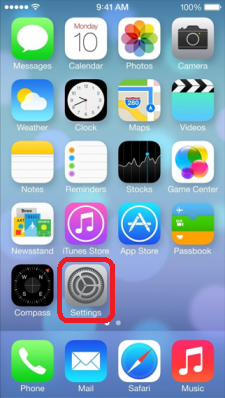
1: Select settings:
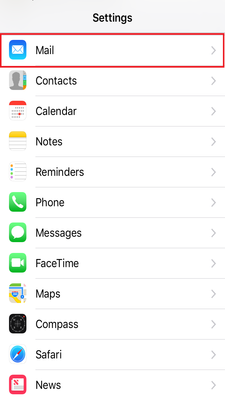
2: Select Mail:
3: Select add account:

4: Select other:

5: Select Add mail account.

6: Select POP, then please enter the following details:
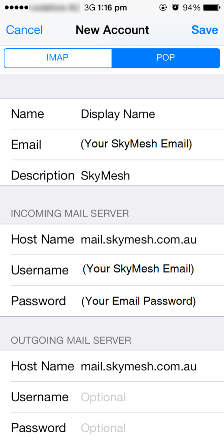
- Email: Your Skymesh email address e.g. johnsmith@skymesh.com.au
- Description: Skymesh or your email address
- Incoming Host Name: mail.skymesh.com.au
- Incoming Username: Your full Skymesh email address
- Incoming Password: Your Skymesh email address password
- Outgoing Hostname: mail.skymesh.com.au
- Outgoing Username: Leave this blank
- Outgoing Password: Leave this blank.
7: Select yes to setting up the account without SSL.

8: Once you have entered all the details, please press save.

9: If you get the box stating that the account may not be able to send/receive mail, confirm that you have entered your details correctly. If you have, then click Save.

You have now completed your Email setup. Require further assistance? Contact Technical Support.
Check your address
See what’s available at your property
“”